> ## Documentation Index
> Fetch the complete documentation index at: https://private-7c7dfe99-vortex-format.mintlify.site/llms.txt
> Use this file to discover all available pages before exploring further.

> ThoughtSpot은 데이터를 실시간으로 검색, 탐색, 시각화할 수 있는 AI 기반 분석 플랫폼입니다.

# ThoughtSpot

export const PartnerBadge = () => {
  return <div className="PartnerBadge">
            <div className="PartnerBadgeIcon">
                <svg width="16" height="16" viewBox="0 0 16 16" fill="none" xmlns="http://www.w3.org/2000/svg">
                    <polyline points="12.5 9.5 10 12 6 11 2.5 8.5" stroke="currentColor" strokeLinecap="round" strokeLinejoin="round" strokeWidth="1" />
                    <polyline points="4.54 4.41 8 3.5 11.46 4.41" stroke="currentColor" strokeLinecap="round" strokeLinejoin="round" strokeWidth="1" />
                    <path d="M2.15,3.78 L0.55,6.95 A0.5,0.5 0,0,0 0.77,7.62 L2.5,8.5 L4.54,4.41 L2.82,3.55 A0.5,0.5 0,0,0 2.15,3.78 Z" stroke="currentColor" strokeLinecap="round" strokeLinejoin="round" strokeWidth="1" />
                    <path d="M13.5,8.5 L15.23,7.62 A0.5,0.5 0,0,0 15.45,6.95 L13.85,3.78 A0.5,0.5 0,0,0 13.18,3.55 L11.46,4.41 Z" stroke="currentColor" strokeLinecap="round" strokeLinejoin="round" strokeWidth="1" />
                    <path d="M11.5,4.5 L9,4.5 L6.15,7.27 A0.5,0.5 0,0,0 6.24,8.05 C7.33,8.74 8.81,8.72 10,7.5 L12.5,9.5 L13.5,8.5" stroke="currentColor" strokeLinecap="round" strokeLinejoin="round" strokeWidth="1" />
                    <polyline points="7.75 13.5 5.15 12.85 3.5 11.67" stroke="currentColor" strokeLinecap="round" strokeLinejoin="round" strokeWidth="1" />
                </svg>
            </div>
            파트너 통합
        </div>;
};

<PartnerBadge />

ThoughtSpot은 네이티브 ClickHouse 커넥터를 사용하여 ClickHouse Cloud 또는 온프레미스 배포 환경에 연결할 수 있습니다.

<Steps>
  <Step title="연결 정보 수집" id="1-gather-your-connection-details">
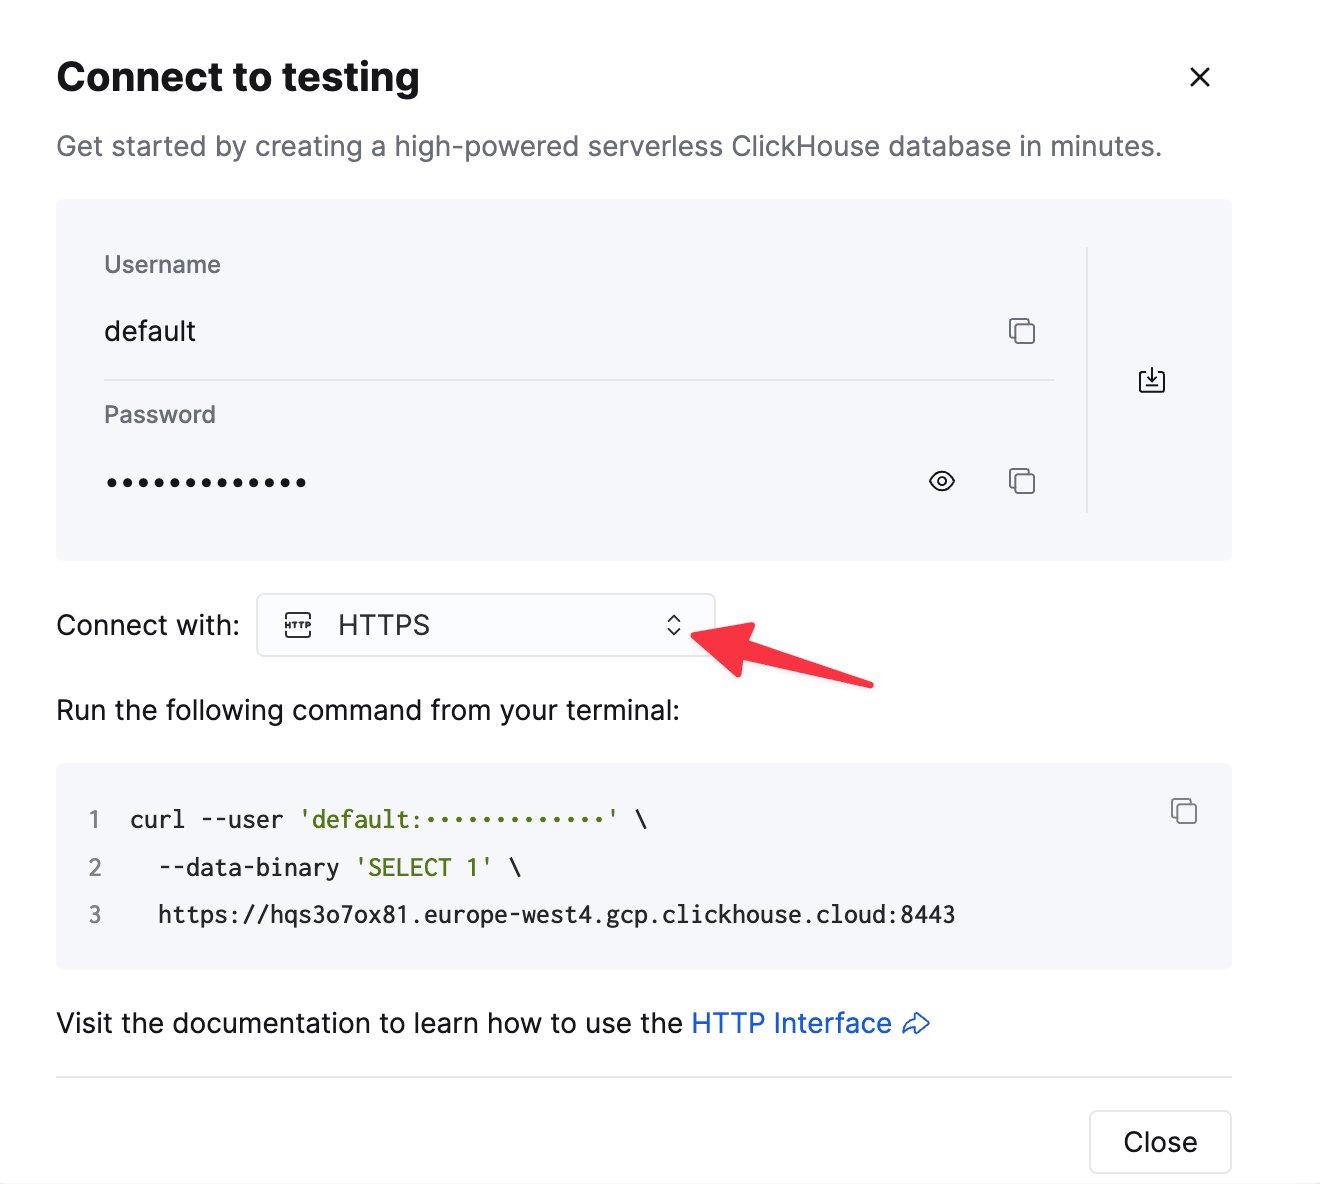
    HTTP(S)로 ClickHouse에 연결하려면 다음 정보가 필요합니다.

    | 매개변수 | 설명 |
    | - | - |
    | `HOST` and `PORT` | 일반적으로 TLS를 사용하는 경우 포트는 8443, TLS를 사용하지 않는 경우 8123입니다. |
    | `DATABASE NAME` | 기본적으로 `default`라는 이름의 데이터베이스가 제공되며, 연결할 데이터베이스 이름을 사용하십시오. |
    | `USERNAME` and `PASSWORD` | 기본 사용자 이름은 `default`입니다. 사용 사례에 맞는 사용자 이름을 사용하십시오. |

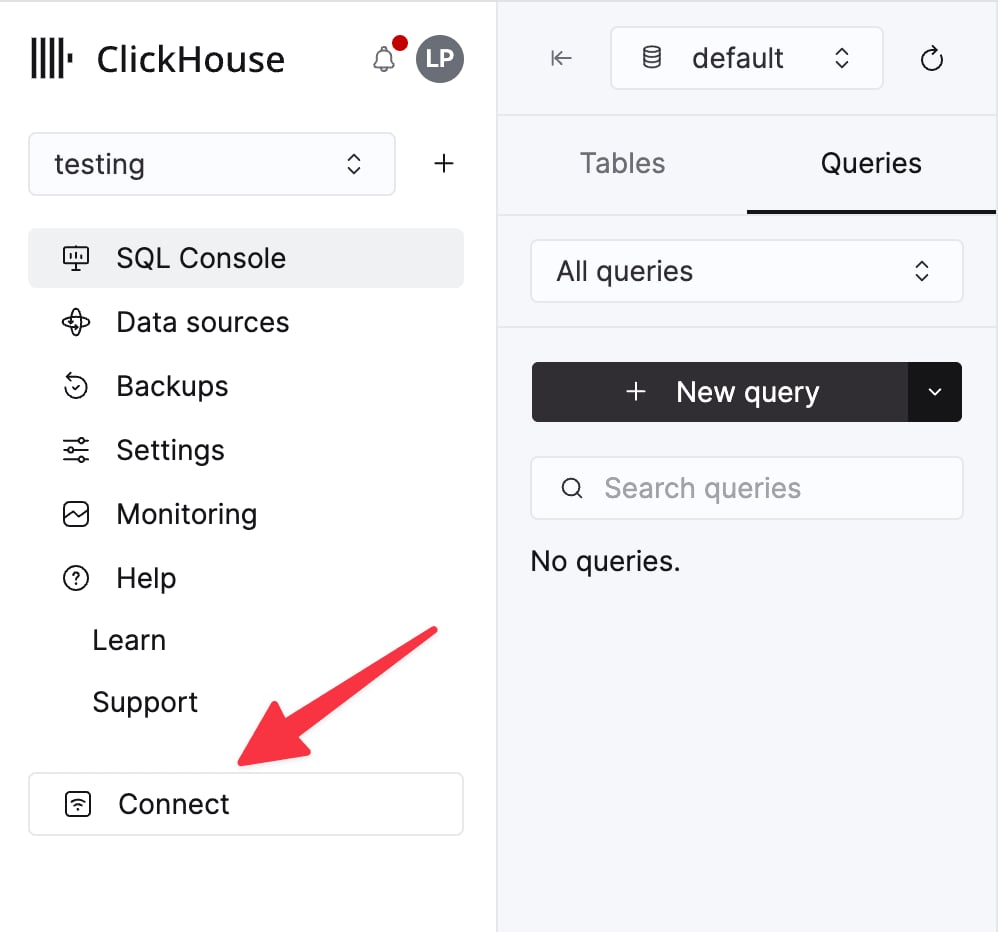
    ClickHouse Cloud 서비스의 연결 정보는 ClickHouse Cloud 콘솔에서 확인할 수 있습니다.
    서비스를 선택한 다음 **Connect**를 클릭하십시오.

    <div className="ch-image-md">
      <Frame>
        <img src="https://mintcdn.com/private-7c7dfe99-vortex-format/tee0vtC1xMN3cEIV/images/_snippets/cloud-connect-button.webp?fit=max&auto=format&n=tee0vtC1xMN3cEIV&q=85&s=334245222c7a16f54a807110b260b71e" alt="ClickHouse Cloud 서비스 연결 버튼" width="998" height="932" data-path="images/_snippets/cloud-connect-button.webp" />
      </Frame>
    </div>

    **HTTPS**를 선택하십시오. 연결 정보가 예시 `curl` 명령으로 표시됩니다.

    <div className="ch-image-md">
      <Frame>
        <img src="https://mintcdn.com/private-7c7dfe99-vortex-format/tee0vtC1xMN3cEIV/images/_snippets/connection-details-https.webp?fit=max&auto=format&n=tee0vtC1xMN3cEIV&q=85&s=0ca54b2dc236ae2cd68a6e889b46dd0b" alt="ClickHouse Cloud HTTPS 연결 정보" width="1320" height="1184" data-path="images/_snippets/connection-details-https.webp" />
      </Frame>
    </div>

    자가 관리형 ClickHouse를 사용하는 경우 연결 정보는 ClickHouse 관리자가 설정합니다.
  </Step>

  <Step title="ThoughtSpot에서 ClickHouse 연결 생성" id="2-create-a-clickhouse-connection-in-thoughtspot">
    1. **Data workspace** > **Connections**로 이동합니다.

    2. **+ Create connection**을 클릭하고 **ClickHouse** 타일을 선택한 다음 **Next**를 클릭합니다.

    3. 연결 이름, 설명(선택 사항), 이전 단계에서 수집한 ClickHouse 연결 정보를 입력한 다음 **Next**를 클릭합니다. 각 속성에 대한 자세한 내용은 ThoughtSpot 문서의 [ClickHouse 연결 참고](https://docs.thoughtspot.com/cloud/latest/connections-clickhouse-reference)를 참조하십시오.

    4. (선택 사항) 쿼리 수준 타임아웃을 구성하려면 **Advanced Config** 메뉴를 엽니다. **Key**에는 `queryTimeoutSeconds`를 입력하고, **Value**에는 타임아웃 값을 초 단위로 입력합니다. 최대 10분 이내로 설정하는 것을 권장합니다.

    5. (선택 사항) key-value 쌍을 추가로 지정하려면 **Advanced Config** 메뉴를 열고 **Key**와 **Value**를 입력합니다. 쌍을 더 추가하려면 더하기 기호(**+**)를 클릭합니다.

           <Note>
             입력하는 모든 key-value 쌍은 ClickHouse 데이터 소스에 정의되어 있어야 합니다. key-value 쌍은 대소문자를 구분합니다.
           </Note>

    6. 사용할 테이블과 컬럼을 선택한 다음 **Create connection**을 클릭합니다. 추가된 테이블 및 컬럼 수를 알려 주는 메시지가 표시됩니다.

    이제 **Data workspace** > **Connections** 페이지에 연결이 표시됩니다. ThoughtSpot에서 ClickHouse 데이터를 검색하고, 연결된 테이블에 실시간 쿼리를 실행할 수 있습니다.
  </Step>
</Steps>